Pages

Showing posts with label Siri Mari Memasak. Show all posts

Wednesday, June 22, 2011

Nasi Tanam Ayam

Hellooooooo!!!! This is just a short entry to share a recipe that has been requested by friends in FB. Started with Nette who tweeted about making Nasi Daging Berempah for dinner. Then she shared the recipe at her blog. Masa tu dah salivate dah tapi my hubby tak makan daging but bila tanya Nette, dia kata tukar dengan ayam pun boleh.

Suddenly a few days after that, Umi Faryhah, my junior from STF days shared a picture of Nasi Tanam Ayam in FB. Looks yummy! When she gave me the recipe, it looks almost similar to Nette's Nasi Daging Berempah, the process at least, and Nasi Tomato I learned from my mother-in-law last Sunday. Finally last night I managed to try it. Here is the recipe I got from Umi. The one in (blue) was how I made mine.

Bwg merah(5),putih(3) n halia (lupa letak) dihiris
Bunga lawang(1),cengkih(2),kayu manis(1 pendek) n buah keras pelaga (2).
Tumiskan semua ni dgn butter(3 heap tbsp planta)+minyak zaitun (x guna) smpi kekuningan..
Masukkan serbuk kari daging/ayam (3tbsp) tu.ni ikut suka kalo nk nasi pedas sikit,letak lebih..
Tuang air secawan (x letak air pun sbb planta over ;p)..then tnggu smpi pecah minyak.
Masukkan ayam (2 whole legs cut into 8 pcs) yg dipotong smpi half cooked.
Then masukkan beras basmathi yg di tos (3 cups).
(masukkan 1 biji bawang besar yang dihiris bulat)
Masukkan susu ideal 1tin,air(ikut sukatan pot or ikut tahap lembut nasi yg nak) (letak susu aje pun dah sampai kat tanda 4.. sepatutnye sampai aras 3 je)
Gaul rata semua,masukkan dlm rice cooker n cook..
Garam masukkan jugak sedikit (3/4 tsp). 


It was not bad for first try yang main agak-agak je ;p Tapi rasanya kurang garam. Macam kurang lemak tapi when I told my mom, dia kata kalau garam kurang mmg kurang lemak rasa. Tak pedas pun jugak. So, next time, I would definitely increase the amount of salt and curry powder. I overdid the Planta so masa nak masak tu sampai 3 kali tekan kat rice cooker still basah tapi mentah. So, I steamed the rice for almost an hour. 3 pots ni of course sangat banyak just for me and hubby so there was plenty for hubby's breakfast and my lunch today. Selamat mencuba!

Thursday, May 19, 2011

Caramel Cake

I first saw this lovely cake at my cousin Nana's blog. Her housemates baked it for her birthday. So, I asked for the recipe and tried it last Friday. It was one of my colleague's last working days so I thought it would be nice to bring something for her. When I was about to bake it, I just realized we were out of eggs. We had, but it was not enough. Managed to persuade hubby to drive us to Tesco. We were home by midnight. So I looked at the recipe and saw the baking time is only an hour and the recipe seems easy.

I remember the cake was quite thick so I decided to use my springform tray as it is thicker than my other baking trays. I started with caramelizing the sugar. Easy peasy. Pour it in the springform and it hardened quite fast. So, I proceeded to make the pudding mix. Very easy as well. Then I poured into the springform. Oh no!!!! the pudding mix came out from the bottom of the pan! My springform leaked! Dang! Panic attack! So I quickly poured the mix back into the mixing bowl. It was already 12.30am and I was cursing debating with myself whether should I continue or just call it a night. But there were 7 eggs in the pudding mix and it would be a waste! So I decided to divide the mix into 2 and use 2 baking trays.

So again, by 1.15am I was done caramelizing the sugars and poured them into 2 baking trays. I continued to prepare the cake mix and then divide both pudding and cake mix into 2 and pour into the trays. As my oven can only fit in 1 tray at a time, both cakes were only ready at 3 am! Put the first tray into the fridge and the other one I just let it cool down in the oven and brought both to the office in the morning.


The caramel cakes were thin but nice! Glad my friend loved it. She has been a good friend and she deserves the lovely cake for her farewell :)

Decided to bake another one after that. I bought a new cake tin and glad it turned out well. Just the right thickness though I think it could have been better if I have a new oven. As I mentioned before, my oven's heat is not balance. Enough with the ramblings, here is the recipe for the yummy caramel cake. Seriously easy. Give it a try!


Caramel Cake
1.Puding
7 biji Telur 
1 cawan Susu fullcream
1cawan penuh gula
3/4 cawan air
Sikit vanila essense

2.Caramel
10sudu besar gula

3.cake
1 cawan tepung gandum
3 biji telur
250g butter
3/4 cawan gula
1/2 cawan air
Vanilla essense
1 sudu kecil soda bikarbonat 

1.(Untuk caramel) panas 10sudu besar gula dalam baking tray,api slow and gaul. Bila dah perang, angkat tray.

2.(Puding) gaul semua bahan sampai sebati. Tuang dalam baking tray tadi.

3. (Cake) pukul butter and gula sampai kembang.letak bahan lain. Bila sebati, letak jugak dalam baking tray.adunan cake akan terapung,so masukkan slowly dlm baking tray.

4.Letak baking tray dalam tray yg diisi air sebelum bakar. Bakar dlm api 180deg sampai masak (about 1 hour)..:) 


P/s: I found out that springform is not suitable for pudding mix hence the mess. So, I don't have to throw my springform :)

Monday, May 9, 2011

Perfect Burger Patty - Trial #1

Hola! I am back! Labour Day weekend was spent in my hometown. Did not even switch on my laptop there. Being with your own family is the greatest isn't it? I can just sleep and laze around and feel so happy and content when I am back at my parents. Last weekend pulak we went back to hubby's hometown in Malacca. Explain panjang-panjang ni konon nak bagi alasan kenapa lama tak tulis lah :)

Anyway, just wanna share that a dear friend ShiQin bought me this amazing Progressive Perfect Burger Press during her trip to US recently.


So now, I am in the quest to find the perfect homemade hamburger patty. The first recipe I tried was given by my Mat Salleh Grandma ;p I chose this first because the recipe made it sound so simple. Here is the recipe:

Ingredients
450g minced meat
1 onion, grated (I chopped)
2-4 garlic cloves, crushed (I chopped)
2 teaspoon wholegrain mustard
pepper
2 tablespoon olive oil

Directions

  1. Place the minced meat, grated onion, garlic, mustard and pepper in a large bowl and mix together. Shape into 4-6 equal-sized burgers, then cover and leave to chill for 30 minutes. (Of course I use the burger press instead)
  2. Wipe the frying pan clean, then heat until hot. When hot, add the burgers and cook for 3-5 minutes on each side until cooked to personal preference. 2-3 minutes before it is done, place a slice of cheddar cheese on top of it. Done!


Verdict
Made 3 thick and juicy burgers. Each patty weighs around 170g. I love its simplicity! As the oil is the only ingredients used to stick the meat together, the meat crumbled in our mouth as you eat. Nyummm~ I will rate this 8/10 (just in case others tastes better) Definitely a keeper!

Thursday, April 28, 2011

Happeeeeeeyyyyy :)

Yesterday was the height of my cooking and baking experience and I was really happy about it I can't stop grinning to my hubby when he came home last night. 

First, one of my best friends (who cooks better than me) baked a bread from scratch! And she said she was inspired by me when I started baking. She (my friend who cooks better than me, I told you right?), was inspired by me! Wow! Never had I thought I would inspire someone like her. Thanks dear. You made my day.

Knowing that my hubby will be home late, I decided to bake 3 types of cookies. One was a new recipe I wanted to try called Blueberry Thumbprint Cookies (but I used wild berries). I also baked Giant M&M Bites for my dear friend and last but not least I baked Dutch Shortcakes for my brother as a present for his birthday tomorrow and for him to munch while preparing for his final. 

On top of that, three of my friends reported that they tried the recipes I shared in this blog and they loved it. Well one of them actually innovated a new recipe based on my Chicken Masorma but it's still counted :) Me, sharing a recipe? If someone told me 5 years ago that I would one day be able to cook and bake (at least for the family) I would never believe it. 

Growing up, I detest cooking. I love to eat all kinds of food and enjoy travelling around just to feed my craving  but kitchen had never been my favourite place. I had never imagine that some day I will be able to cook, even the day-to-day dishes. We were lucky to have maid to help my mom in the kitchen when were growing up and even when we were in between maids, the most my mom would ask for my help was to clean the prawns or cook the rice. To me cooking was just not my thing. Something I am not good at so why bother spending time learning it.

After I got married, I started to learn how to cook. It started with Brahims of course and all those instant Maggi packets like black pepper and sambal tumis. Only end of last year, when my mom gave me the breadmaker, I found myself beginning to enjoy baking and cooking. I started to look for new recipes to try and some of the dishes actually turned out, not so bad. I guess it's never too late for one to learn how to cook or bake. What you need is just passion for your new hobby. Err, did I say cooking is my new hobby? :)

Wednesday, April 27, 2011

Wordless Wednesday #3

Dutch Shortcakes

This recipe is quite simple and loved most by Adam and his dad. I used a cheap piping bag and when I was about to pipe the dough, it tore! So I had to pipe the dough using just the nozzle. Surprisingly, it did not stress me out but made me laugh instead :) So, if you wanna make this shortcakes, make sure you have a good and strong piping bag. Or you can just make a ball and flatten it :)

Ingredients
2 tablespoon custard powder (or cornflour)
180g plain flour
150g butter
80g caster sugar
1 egg yolk

Directions

  1. Preheat the oven to 180C. Sift the custard powder and flour together.
  2. Cream the butter and sugar together and beat in the egg yolk. Mix in the flour well.
  3. Put the mixture into a piping bag fitted with a large star nozzle and pipe three flat zig zag lines about 5x25 cm on a non stick baking sheet. (I made smaller lines maybe about 3x15cm each)
  4. Bake in the oven for 15-20 minutes until pale golden brown. While still warm, cut each piece into six and cool on a wire rack.


Tuesday, April 26, 2011

Asam Pedas Melaka

Actually recipe ni dapat from my sister in law, anak jati Terengganu. Tapi dia dapat from her sister yg pernah kerja kat Melaka bertahun-tahun and sekarang ada kedai Asam Pedas Melaka somewhere in Cheras. And bila guna resipi ni jugakla first time my hubby (org Melaka) cakap jadi! Kalau tak mesti ada je x cukup masamla x cukup pedasla walaupun pada tekak orang Terengganu ni dah rasa hebat giler..  Ok so here is the recipe..


Bahan-bahan
1 biji bawang besar, ditumbuk
3 ulas bawang putih, ditumbuk
6 sudu besar cili boh (saya guna cili kering yang dah direbus n blend)
1 cm kunyit hidup, ditumbuk (saya guna 1 sudu kecil serbuk kunyit)
1 cawan air asam jawa (asam jawa lebih kurang besar bola ping pong)
2 keping daun limau purut, dikoyak
Bendi
Garam
Ikan Tenggiri/merah

Cara-cara

  1. Tumis bawang besar dan bawang putih
  2.  Tambah cili boh, kunyit hidup dan belacan. Teruskan tumis sehingga naik bau.
  3.  Tambah daun limau purut.
  4. Selepas naik bau dan pecah minyak, tambah air asam jawa.
  5. Biar lama sikit dan rasa dulu baru masukkan ikan.
  6.  Tambah terung atau bendi.
  7.  Tambah garam secukup rasa.
  8.  Kalau perlu tambah air, tambah dengan sedikit asam jawa.
  9.  Biar sehingga kuah pekat dan ikan masak
Adik ipar saya cakap, trick dia, jangan tambah air banyak sebab asam pedas melaka selalunya pekat so air asam jawa tu dah cukup. Lagi satu, cili tu kena tumis lama, biar betul-betul masak macam nak buat sambal. Ok selamat mencuba!

Friday, April 15, 2011

Mini Mushroom Pizza

Hubby is more of "tekak melayu" so given the choice, he would prefer to eat lauk pauk with rice. Whenever I have craving for pizza and we decided to order a delivery, he would opt for spaghetti and I am down with limited choice because I can only order personal pizza with one type of topping :(

I am in a mission to make sure our child(ren) loves pizza as much as I do :) So when I saw this box at MPH the other day, I bought it without thinking twice. At RM39.90, it was a good buy.


For a lot less than the price of a pizza stone itself, you can find easy step-bystep instructions for everyday dinners and gourmet delights. This kit includes: " a 48-page recipe book full of tasty pizza ideas " 9-inch pizza stone for the perfect crispy base " Wire rack for serving " Metal pizza cutter for perfect slices every time - MPH Book Store
The first pizza I tried to bake from the recipe book was Famous Mushroom Pizza. I made only 1/3 of the original recipe and added some frankfurters as well. Here is how I made the pizza for Adam, adapted from the recipe book. It yielded 2 mini pizza for my lil' boy.

Base
1/2 teaspoon dry yeast
1/3 cup warm water
1/3 teaspoon sugar
1 cup plain flour
1 tablespoon olive oil
1/2 teaspoon salt

Toppping
1/3 tablespoon olive oil
1/2 cup tomato paste
1 onion, sliced
shiitake mushroom, sliced
2 chicken frankfurter, sliced
a little more olive oil to drizzle over pizza
Cheddar cheese, grated (make sure it's not fresh from the fridge like mine. It did not melt but became crunchy instead ;p)
salt and pepper to taste
sprinkle of dried pizza mixed herbs (original recipe asks for rosemary but I happen to have the pizza mixed herbs in hand)

Directions
1. Dissolve the yeast in the warm water with the sugar. let stand until it foams. (if it did not foam after 6 minutes, throw the yeast. The water might not be at the right temperature or the yeast is old. I threw my first batch of yeast as it did not foam but the second batch did not foam as well but I still use it and turned out OK. So, don't worry too much)
2.Sift the flour into a bowl and add the yeast mixture, olive oil and salt. Mix to combine and set aside until doubled in size.
3. Turn out onto floured board and knead to form a soft dough.
4. Press a piece of the dough, about the size of a ping pong ball onto a pizza tray.
5. Brush the pizza base with the olive oil, soread liberally with tomato paste, then add the onion, mushrooms and frankfurters. Drizzle with more olive oil and cover liberally with the cheese, salt and pepper. Sprinkle with the dried herbs.
6. Place in a preheated oven at 220C for 15 - 20 minutes.

Thursday, April 14, 2011

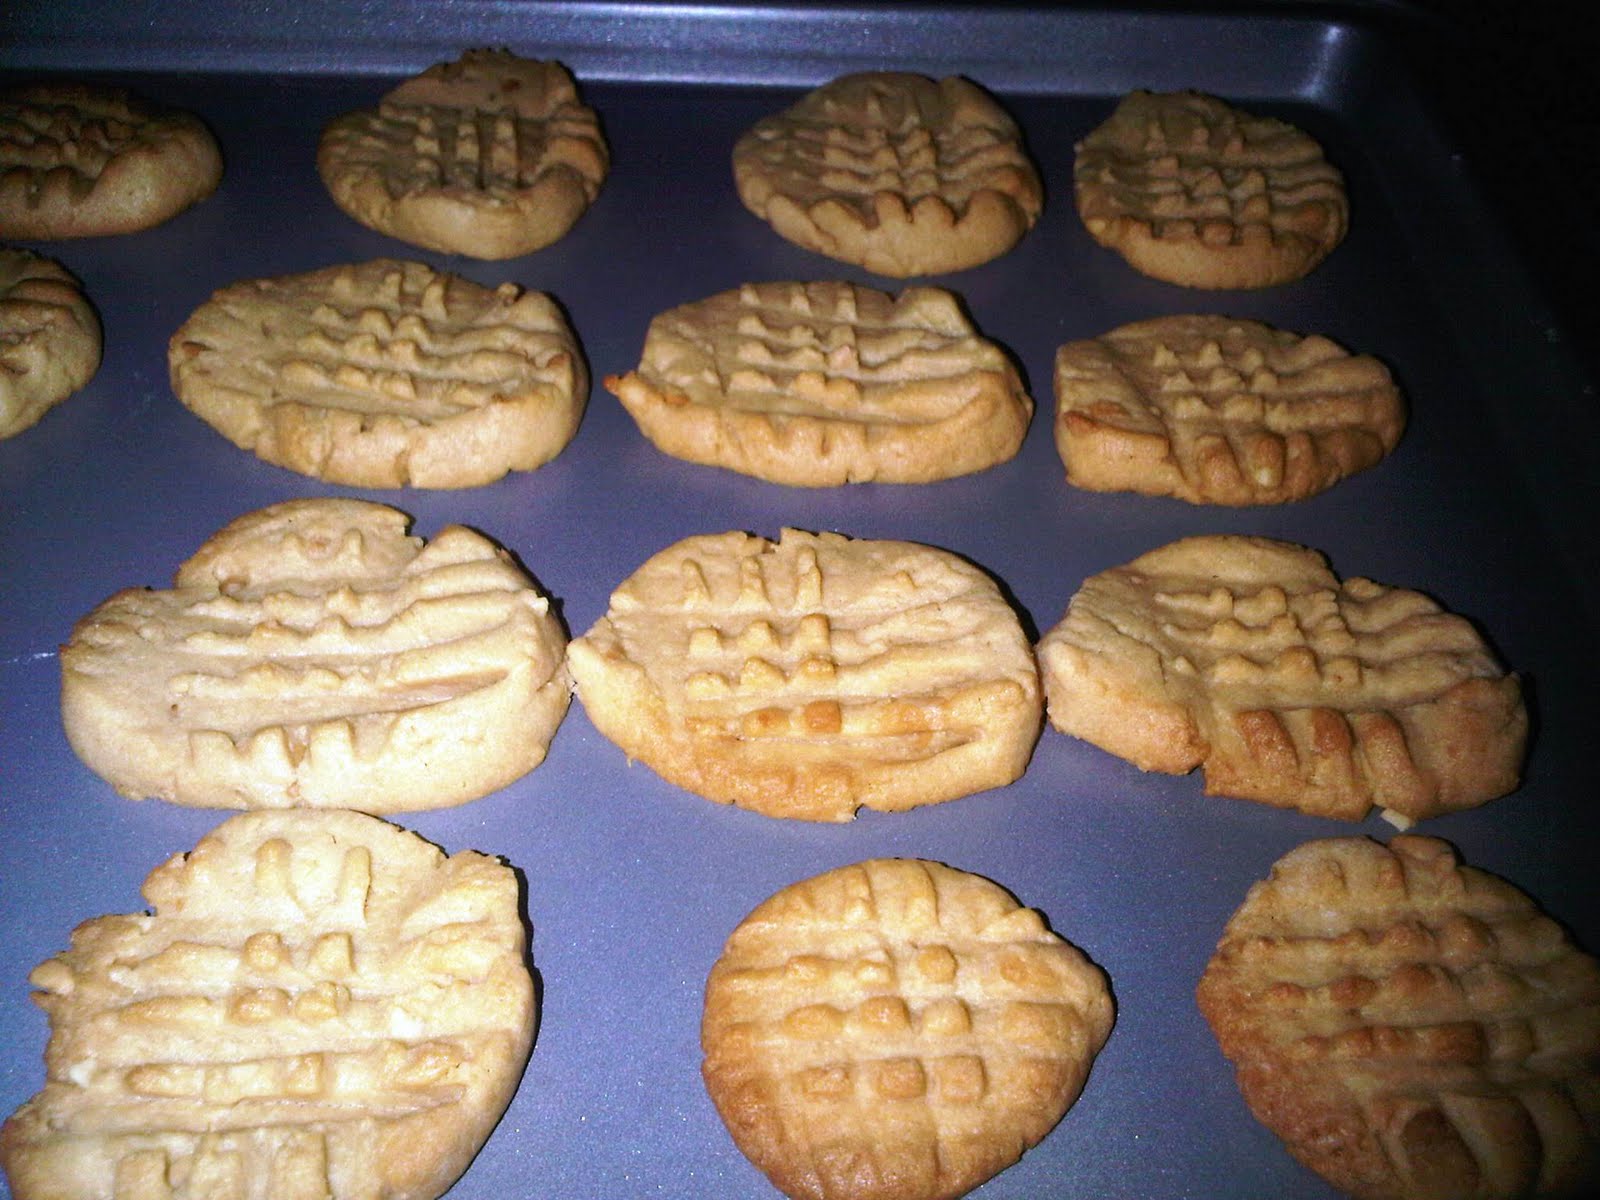
Peanut Butter Cookies

Another cookie recipe? I found cookies easier for a beginner like me. Cakes are more complicated and most importantly, neither Adam or his dad are a big fan of cakes. It feels good to see Adam's cookie jar full of homemade cookies and every time he had one, he will tell me "daaap". That one word is enough to motivate me to bake more cookies.

As I am still new with cookie baking, I am excited to try as much recipe as possible so I would know which one my lil' cookie monster loves most. Anyway, I baked this before my "Main Masak-Masak" session with the girls last weekend. Started making it at midnight and done by 1.30am as the dough required some chilling before I can bake them. So here is the recipe for your own lil' (or big) cookie monster at home.


Ingredients
6 tablespoons butter
6 tablespoons sugar
150g crunchy peanut butter
1 egg
3 tablespoons golden syrup
175g plain flour
1 teaspoon baking powder

Directions
1. Preheat the oven to 180c. Lightly grease two baking sheets.
2. Cream the butter and sugar together until pale and fluffy. Add the peanut butter, egg and golden syrup and beat until well combined.
3. Sift the flour with the baking powder and work into the mixture to form a soft dough. On a lightly floured surface, knead the dough lightly, then shaped into thick log. Cover with plastic wrap and let chill for 30 minutes.
4. Cut the dough into slices 5mm thick and space well apart on the baking sheets. Press a criss-cross pattern into the dough with the tines of a fork.


5. Bake until golden, 10-12 minutes. Let cool on the baking sheets for 2-3 minutes, then transfer to a wire rack to cool completely. Store in an airtight container for up to five days.


Cookie Tip
1. Use smooth peanut butter if you prefer a creamier texture.
2. The recipe actually yields 24 pieces if you roll a very thick log. I guess mine was not as thick as I managed to get 40 pieces out of it. Just the right size for Adam and the rest of the kids :)

Wednesday, April 13, 2011

Giant M&M Bites

When I went to MPH the other day, I fell in love with this book. Cookies Galore by Jacqueline Bellefontaine.


What I like about this book is that it is divided into a few sections like Kid's Cookies, Holiday Cookies, Grandma's Favourite and so on. One of the recipe that attracted me most was the Giant M&M Bites from the Kid's Cookies section. The recipes are also very simple and do not require Not-available-in-Malaysia ingredients like some other cookies recipe books.

My cousin Jihana once told me how easy and yet tasty M&M cookies are. So that very night, I decided to bake my first batch of Giant M&M Bites and it was really easy! Managed to prepare the cookie dough quite fast and the baking time was not that long too. Here is the recipe if you wanna try it.

Ingredients
125g butter, softened
75g sugar
75g soft light brown sugar
1 egg
1 teaspoon vanilla extract
200g self-raising flour
100g peanut or chocolate  M&Ms or sugar coated chocolates

Directions
1. Preheat the oven to 190c. Lightly grease the baking sheet. (I used non stick tray)
2. Cream the butter and sugars together until light and fluffy. Beat in the egg and vanilla. Sift the flour and beat into the mixture. Add the M&Ms and stir until well combined.
3. Drop rounded tablespoons of the dough on the baking sheets, spacing well apart as the cookies will almost double in size.

4. Bake until golden, 8-10 minutes. Cool on the baking sheets for a few minutes before transferring to a wire rack to cool completely. These are best eaten the day they are made. (Ours lasts for a week and still tasted great)


Cookie Tip
1. Always stir flour prior to measuring - flour settles as it sits and if you don't stir it you may end up adding too much to your cookies.
2. The cookies were quite big for Adam and he always managed to ate only half of it. So, maybe I will drop only half a tablespoon of the dough instead.
3. I was not so careful when stirring the M&Ms so some of them were crushed in the process and some of the cookies had more M&M than the other. Some has only 1 M&Ms. I read from other recipes, instead of mixing the M&Ms in the dough, you can just place the M&Ms on the dough that you have dropped on the tray. This way, the M&Ms will not sink in the cookies. 

Good luck trying!

Tuesday, April 12, 2011

Chicken Schnitzel with Grilled Eggplant and Tomato Salad

My friend persuaded me to try Junior Masterchef Australia's Chicken Schnitzel with Grilled Eggplant and Heirloom Tomato Salad for quite some time and finally I gave it a try last month. True enough, it was pretty easy! I shared a picture of it in my FB and another friend of mine has been persuading me to copy the recipe and put it in my blog. So, Tika, this is my version of the recipe specially for you on your birthday. Happy Birthday! :)

Ingredients
200g breadcrumbs
50g parmesan cheese, grated
6 sprigs thyme, leaves only
2 sprigs rosemary, leaves only
Pinch salt and pepper
2 chicken breast fillet
1 egg
2 tablespoons milk (I use Nespray)
70g plain flour
olive oil for frying
40g butter, chopped

Salad
1 round eggplant
1 tablespoon olive oil
Juice of half a lemon
Extra virgin olive oil for drizzling
1 tomato sliced
100g baby tomatoes
110g mozarella cheese
1 cup mixed salad

Directions

1. Process breadcrumbs and parmesan in a food processor until well mixed. Add herbs and season with salt and pepper, process untill finely chopped.
2. Place one chicken breast in between 2 sheets of cling film and lightly pound with the flat side of meat mallet to flatten (I used the wooden dough roller). Repeat with the other breast fillet.
3. Whisk egg and milk together in a bowl. Coat one piece of chicken in flour and shake to remove excess. Then dip the chicken into the egg mixture.Then coat the chicken in breadcrumbs, pressing firmly to coat. Repeat with remaining pieces and crumbing mixtures. (To have a thicker crunchy skin, dip the chicken in the egg and coat in breadcrumbs once again)
4. For the salad, slice the eggplant into two. Heat olive oil in a grill pan over high heat. Cook eggplant until tender and golden. When cooked, place on a paper towel-lined baking tray. Arrange salad, tomatoes and eggplant in a plate. Dress with a squeeze of lemon juice, torn mozzarella and extra virgin oil and season to taste. Toss to combine.
5. Heat oil in a large frying pan over medium heat, cook chicken in batches, until tender and golden. Reduce heat to low and add butter around the chicken. Cook until crispy, remove and place on to the paper towel-lined baking tray.
6. Serve the chicken with the salad.


Friday, February 25, 2011

Ayam Masorma

Missed me? :) Was not feeling well before. Yes, this is going to be another cooking entry. Looks like my blog has evolved to a cooking blog. Anyway, I really can't wait to share this so I made no effort to post another entry that is non-cooking related.

What was I so excited about? I think I have mentioned before that I am a little phobic, well, yeah alot, when it comes to.. jeng jeng jeng... cooking dishes that has coconut milk in it. That is why my cooking resolution this year is to conquer masak lemak and curry which could be the easiest dish to some of you. Anyway, last week, my colleague brought some chicken dish for lunch. It was something I had never even tasted before and it was good. It was a cross between rendang, asam pedas and masak merah?! What surprised me most was it sounded so easy to cook!

Finally, last night I managed to try the recipe. Might not be as good as my colleague's but good enough for me :) As my colleague did not have any name for the dish, my husband named it Ayam Masorma. Why? That's our secret. :D

Ingredients
3 pieces chicken thigh (halves)
4 (heap) tablespoon of chilli paste
4 (heap) spoon of blended shallots
1 glass of water (as necessary)
1 turmeric leaf
1 stalk bruised lemongrass
4 tablespoon tomato sauce
4 tablespoon coconut milk (if you are using the one in a box, about 1/4 of the box)
1/2 teaspoon sugar
1/2 teaspoon salt

Methods

 
If you are using dried chillies instead of the chilli paste, blend the shallots together with the chillies and 1 glass of water. Pour the blended ingredients into the pot and mix with the chicken. Cover the pot and let it simmer.


 When the chicken is half cooked (above pic), add in:

 tomato sauce,

 coconut milk, and

 sugar and salt. If it is too dry, add in some water (compare above pics). *Mine was dry because I use pre-blended chilli paste and shallots so in total I only add in 1 glass of water.

 Then, add in bruised lemon grass and turmeric leaf (cut into small pieces). Stir for a while, lower the heat and let it simmer.

When the chicken is cooked and you can see some oil on the top layer, your Ayam Masorma is ready!


Serve it with hot rice. Nyummmmm~~~~

Thursday, February 10, 2011

Nasi Ayam oh Nasi Ayam

Masa balik dari Kijal last weekend, kitorang singgah rumah my aunty. As it was almost dinner time, my darling aunty invited us for dinner. Her maid dah takde so I offered to help and at the same time belajar macam mana nak buat nasi ayam coz according to her, kalau nak cepat, dia akan masak nasi ayam.

But masa nak masak nasi ayam semalam, terlupa a few steps and bila try call aunty tak angkat lah pulak.. So I called my mom and asked how she makes her Nasi Ayam. Jadinya semalam kitorang dinner nasi ayam version campur-campur. After letak gambar kat FB ada plak yang nak tau resepi. Diorang ni dah tere memasak sebenarnya maybe just nak tengok sama ke tak dengan diorang kut.. Bagus jugak diorang ni dah tere sebab I don't know the exact ingredient amount so ni adalah resepi untuk mereka yang dah biasa di dapur sahaja ye :) (Masa mula2 masak dulu sangat tak suka resepi macam ni and semua yang ada ayat secukup rasa)

Nasi Ayam simple


Bahan-bahan
Halia
Bawang Putih
Chicken stock
Kicap Manis
Kicap Masin
Kunyit
Beras
Butter
Olive Oil (takde pun takpe)
Daun pandan
Cuka/Limau kasturi
Roman Lettuce Salad
Tomato
Telur rebus (takde pun takpe)
Garam
Gula

Cara-cara (mengikut sequence masa masak semalam)

  1. Rebus ayam dengan bawang putih dan halia. Pastikan air cukup untuk masak nasi dan buat sup.
  2. Bila dah menggelegak and ayam dah masak, keluarkan ayam.
  3. Larutkan kunyit dengan kicap masin dan kicap manis. Kicap tu sikit dulu takpe nanti boleh tambah.
  4. Perap ayam dengan #3. Tambahlah kicap secukup rasa. Kicap manis letak banyak sedap ayam jadi hitam dan lemak manis.
  5. Panaskan kuali dan cairkan butter. Kalau ada olive oil boleh masukkan sikit supaya butter tu tak hangit. Tumis bawang putih dan halia sampai garing.
  6. Masukkan beras yang sudah dibasuh ke dalam tumisan #5 dan goreng beras sehingga kering sikit dan butter tadi dah sebati (eh ke rata? maknanye dah evenlah mix tu)
  7. Masukkan beras ke dalam rice cooker, masukkan sedikit garam (dalam 1 tsp). My aunty kata lebih pun tak apa sedap nasi tu masin-masin sikit.
  8. Masukkan air rebusan ayam tadi sebanyak yang diperlukan ke dalam rice cooker. Pastikan ada lebihan untuk buat sup. Masukkan sehelai daun pandan dan boleh mula masak nasi.
  9. Potong salad dan tomato dan susun ke dalam pinggan. My mom suka letak telur rebus yang dipotong nipis-nipis kat atas salad tu.
  10. Tumbuk/blend cili hidup dengan sedikit gula, garam, air rebusan ayam, cuka/limau secukup rasa. Kalau x cukup pedas boleh tambah cili padi sikit.
  11. Kepada yang suka makan nasi ayam dengan halia, bolehlah tumbuk/blend sedikit halia.
  12. Air rebusan ayam tadi bolehlah diletak di atas dapur semula untuk buat sup. Masukkan garam, chicken stock, bawang putih dan halia secukup rasa. Kalau nak sup ni wangi, boleh juga tumis dulu bawang putih dan halia sikit kemudian tuang air rebusan ayam tadi sebelum tambah bahan-bahan perasa.
  13. Panaskan minyak, dan goreng ayam yang diperap tadi. Pastikan minyak betul-betul panas supaya ayam jadi garing. Tak perlu goreng lama sebab ayam dah masak. 
Sedia untuk dihidangkan kepada keluarga tersayang :)


It took me an hour to prepare this last night. So, masak nasi ayam ni cepatlah eh? Tapi kenapa masa bujang dulu pernah masak nasi ayam dengan housmates start masak dari tengah hari dah nak buka puasa baru siap semua... Nampak sangat masa tu sangat tak ada skill multi task masa memasak langsung :)

Monday, February 7, 2011

Siri Mari Memasak: Chicken Stock/Broth using Slow Cooker

I used to stock up lots of instant finger food like sausages, burgers, nuggets, drummets, fries and so on. But a couple of months back, I realised my maid fried the chicken nuggets for Adam almost every day for him to eat with his nasi goreng or spaghetti. Even I have asked her not to do that, her answer was "tapi Adam sukaaa". That's when I decided to put a stop to it by not buying them anymore.

That doesn't mean I don't allow Adam to eat nuggets and all but at least not at home. Adam is only 2 and he doesn't know to ask for specific food yet. So before he is 5 and refuse to eat if he doesn't have fries for lunch, nuggets for tea and so on, I vowed on having healthier food at home. Because God knows what they put in our food when we dine outside. And we eat out quite often. 

I never use chicken stock in Adam's food before and though many recipe requested for chicken stock I usually omit it. Last 2 months, I made my first batch of chicken stock and lovin' it! I finally got to use the slow cooker I received as a wedding gift more than 3 years ago. My maid used the stock to make Adam's soup and I used it in all sorts of dishes. It certainly added flavour to my dishes and definitely healthier than the chicken cubes. Now we are almost out of the stock so I am making a new one and wanted to share the recipe with you.

Ingredients


5 chicken carcasses (you can buy it at the hypermarket)
5 stalks of celery, chopped
3 carrots, chopped
1 1/2 onion, quartered
1 sprig fresh rosemary
2 sprigs fresh parsley
1 tablespoon dried basil
1 tablespoon dried thyme
1 teaspoon black peppercorns
1.8 litres of water

Directions


1. Place everything in the slow cooker.
2. Cook on low setting for 10 hours.
3. Strain the broth. You can discard the vegetable. The chicken can be used in soup.
4. Keep in refrigerator for a few hours until you can see the foam of fat layer on top. Carefully scoop off the fat and you will have clear broth. Divide them into small containers and freeze them for later use. Make sure you always have a small container in the fridge for daily use. 

Easy peasy right? Cheers to a healthier home cooked meal! 

Thursday, February 3, 2011

Roti Paun

If you have been to Terengganu, you might noticed the sign "Roti Paung (Terengganuspeak for Paun) Panas" almost everywhere. My favourite roti paung is sold at Shell Batu Buruk under the label Ngor Bites or something of that effect.

My guess, roti paung or paun came from the word pound. Maybe 1 batch of roti paung weighs 1 pound. Anyway, if you have tried roti paung before, you would notice that they are very soft and the structure is so simple. Even after a few days, the bread would still be soft and one would not satisfy you as they are made into small little buns.

Anyway, as you might have known, my latest hobby is trying out new recipes. Last night, I decided to try MamaFami's Roti Paun. In her blog she gave credit to Bro Rozzan and rnana. I have tried a few recipes from MamaFami before and they all turned out well. So I decided to give this a try. It might not be the best roti paun I ever tasted but it sure is one of the best :)

Here is the recipe posted in MamaFami's Blog:

ROTI PAUN
Source : rnana @ Forum Komuniti Teratak

Ingredients :

1/2 cup luke warm water
1 egg (large)
300 g flour
80 g sugar (my scale is not that accurate so I convert it to 2/5 cups*)
20 g milk powder (1 tablespoon)
1 teaspoon instant dried yeast
1/2 teaspoon bread softener
1/4 teaspoon (heap) bread improver
1 tablespoon margarine


Method : (using Bread Maker)

1. Pour the lukewarm water into the bread maker pan. Add in egg.
2. Add in flour, sugar, milk powder, instant dried yeast, bread softener and bread improver.
3. On the bread maker to Dough setting. (This setting will takes about 1 1/2 hour to finish it's cycle.)
4. Once the dough is just combined, add in the margarine. Let the BM continue it's process. (I added the margarine with the liquid)

the dough is ready

5. After about 1 1/2 hour, remove the dough from the pan and divide to 63g each. Make into round balls and leave to rest for 10 minutes. (my balls were about 60+grams each and I managed to get only 8 balls. To make the ball,  just pull the top skin to the bottom of the ball so it made a clear smooth top)

The size is not the same as those that has been shaped will raise while you shape the others

6. Grease a 9 x 9 inch pan with margarine and coat with a bit of flour. Remove the access flour. (I use round pan as I only got 8 balls of dough. I skipped the greasing part because I used non-stick baking tray)

7. Shape the balls again and place them in the prepared tin. (As my favourite roti paung has margarine taste at the bottom, I decided to insert some margarine in a few of the balls)

put the margarine at the bottom of the dough

then you pull the dough from top to hide the margarine 

Wrap the tin and let the dough prove again. In my case, I left it for more than 2 hours. (I left it for 2 hours 15 minutes and covered the pan with wet towel)

cover the pan with wet towel

8. When the dough is double the size, bake in a preheated oven at 180 C for 20 to 25 minutes. (I baked for 20 minutes)

the dough ready to be baked
as my oven's heat is not equally spread, I had to turn the pan after 10 minutes

9. Once out of the oven, brush with margarine for a shiny effect.
fresh from the oven

after the shiny effect

the bottom - the yellow part are the ones with margarine inside it

the inside texture

You can enjoy it on its own or dunk it in Nescafe/Milo. Yummy!


* Conversion Table that I use:

Gram To Volume Chart

ProductGrams
Per Cup
Grams
Per Ounce
Grams
Per Teaspoon
Grams
Per Tablespoon
Baking powder, double acting


4.6 grams

Baking soda


4.6 grams

Butter
227


14.2 grams
Buttermilk
245
30.60 grams per fl


Flour, all purpose
125


Flour, whole wheat
120
15 grams per oz
2.5 grams
7.5 grams
Gelatine, unflavored
227
28.38 grams
4.7 grams

Oil, olive
216


13.5 grams
Oil, vegetable  (liquid)
218


14 grams
Peanut butter
258


Rice, long grain, white
185


Salt, table
292


Shortening, vegetable or lard (solid)
205


12.8 grams
Sugar, brown
220

4.6 grams

Sugar, granulated
200

4.2 grams

Sugar, powdered (unsifted)
120

2.5 grams
8 grams
Vanilla Extract
208

4.2 grams
13 grams
Water
237
29.57 grams


Yeast, bakers, dry active
224
28.00 grams